Leave Your Message

7 Tips for Choosing the Right Dual Crown Fork

Choosing a Dual Crown Fork is not simply a matter of chasing the longest travel or the largest axle. It is a decision about control, compatibility, riding style, and maintenance. A downhill racer may need a stiff chassis for steep landings. A freerider may value smoother small-bump movement and dependable adjustment. Your frame, wheel size, head tube, brake mount, and travel limit must agree before the fork reaches the trail.

Mountain bike suspension expert Chris Porter once said, “Suspension should help the rider stay balanced, not distract the rider from riding.” That idea is useful, although real setup choices are rarely perfect. A fork that feels brilliant on a rough race track may feel harsh during slower technical climbs. Small details matter. Check the axle standard. Measure the crown clearance. Confirm the steerer length. Then consider compression settings, rebound range, spring system, and service access.

This guide examines seven practical tips for selecting the right Dual Crown Fork. It focuses on decisions riders can verify, not impressive-looking specifications. A heavier fork is not automatically stronger for your needs. More adjustments are not always better. Sometimes, a simpler fork performs more consistently because its settings are easier to understand and maintain. Even experienced riders can overlook fit or geometry changes. That is the uncomfortable part. The right choice depends on how, where, and how often you ride. Performance begins with compatibility, then improves through careful setup and honest testing.
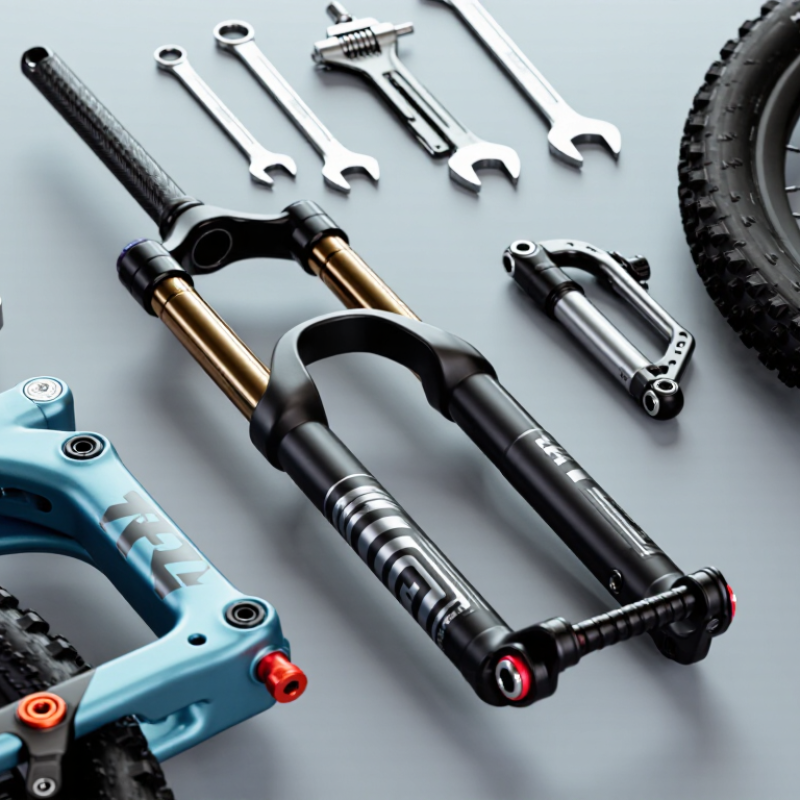
7 Tips for Choosing the Right Dual Crown Fork

Understanding Dual Crown Fork Design and Intended Use

A dual crown fork uses two crowns to connect its stanchions to the steerer. The upper and lower crowns spread clamping forces across the chassis. This design improves steering precision and resistance to twisting. It also adds weight and limits frame compatibility. That trade-off matters.

Tip one: match the fork to the bike’s intended use. A downhill chassis can accept greater impacts and longer travel. A trail bike usually needs lighter steering and more frame clearance.

Tip two: check travel and axle-to-crown length. Longer travel can raise the front end and change handling.

Tip three: inspect the axle standard and hub fit before ordering.

Tip four: measure the steerer length carefully. The steerer must pass through both crowns, headset parts, and spacers.

Tip five: confirm tire, fender, and frame clearance at full compression. Use a measured check, not a guess.

Tip six: assess setup adjustment. Air pressure, spring rate, rebound, and compression should suit rider weight and terrain. Too much compression can hide poor spring support.

Tip seven: inspect service requirements and crown condition. Look for clean seals, straight stanchions, and secure bolts. A small oil film may indicate service is due. Ask a qualified mechanic to verify torque values and compatibility data. I have seen riders choose stiffness over control, then struggle on slow, uneven sections. The mistake is understandable. Record measurements before buying, because small geometry changes can feel surprisingly large.
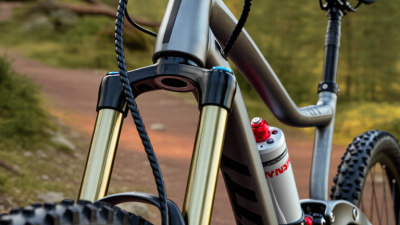
Matching Fork Travel and Wheel Size to Your Riding Style

Choosing a dual crown fork starts with your trail, not its aggressive appearance. The 2024 Outdoor Participation Trends Report from the Outdoor Industry Association recorded roughly 10 million U.S. mountain-bike participants in 2023. That audience includes bike parks, downhill tracks, and long alpine descents. Each style needs a different travel range.

For steep downhill lines, 190–200 mm of travel provides more impact margin. It also raises the front end and slackens the head angle. That can improve control, but climbing becomes awkward. A 170–180 mm fork suits mixed enduro riding better. It keeps the bike more balanced on technical climbs. Check the frame’s approved travel first. ISO 4210-2:2023 emphasizes compatibility, structural safety, and correct assembly.

Wheel size changes the decision. A 29-inch wheel rolls over roots smoothly and carries speed through rough sections. A 27.5-inch wheel feels quicker in tight corners and usually allows more heel clearance. Some riders prefer a mixed-wheel setup, but axle height and bottom-bracket position must remain sensible. Measure carefully.

I once chose maximum travel for a bike-park build. The fork felt powerful, yet the front wheel wandered on climbs. That mistake still matters. More travel is not automatically better. Set sag near 25–30%, then test braking, turning, and compression on familiar terrain. Leave room for honest reassessment.

7 Tips for Choosing the Right Dual Crown Fork - Matching Fork Travel and Wheel Size to Your Riding Style

Tip Typical Riding Style Common Wheel Size Suitable Travel Range Why It Works Selection Check
1. Match travel to impact demand Downhill racing and steep, rough descents 27.5 in or 29 in 200–203 mm Long travel provides greater bump absorption and helps maintain control over repeated high-speed impacts. Confirm that the frame is designed for the fork’s axle-to-crown length and travel.
2. Choose a shorter fork for bike-park versatility Freeride, jumps, drops, and technical park trails 26 in, 27.5 in, or mixed-wheel setups 180–200 mm A slightly shorter travel fork can make takeoffs, landings, and maneuvering feel more responsive while retaining strong impact support. Prioritize stiffness, crown clearance, and compatibility with the frame’s intended geometry.
3. Consider wheel rollover and handling High-speed racing on roots, rocks, and uneven terrain 29 in 180–203 mm The larger wheel generally rolls over obstacles more easily and carries momentum effectively through rough sections. Check tire clearance, hub spacing, and whether the frame accepts the intended wheel diameter.
4. Select a smaller wheel for agility Tight tracks, jump lines, technical maneuvering, and pump-track-style riding 26 in or 27.5 in 180–200 mm Smaller wheels can feel easier to rotate, reposition, and control in compact terrain and during airborne maneuvers. Avoid using a wheel size that changes the frame’s intended bottom-bracket height or steering balance excessively.
5. Match chassis stiffness to rider and terrain Aggressive riders, heavy braking, and rock gardens 27.5 in or 29 in 190–203 mm A dual-crown chassis typically offers increased torsional and fore-aft stiffness for precise steering under heavy loads. Check the manufacturer’s rider-weight limit and use the specified axle, crown, and steerer standards.
6. Use geometry as a compatibility filter Any riding style requiring a replacement or upgrade fork The frame’s approved wheel size Use the frame-approved travel only Changing travel or axle-to-crown length can alter head angle, bottom-bracket height, reach, and front-wheel loading. Verify axle-to-crown length, offset, steerer diameter, crown clearance, and headset compatibility before purchase.
7. Tune the fork after choosing the format Riders seeking balanced grip, support, and bottom-out control Any compatible wheel size Any frame-approved range Correct air pressure or spring rate, sag, compression, and rebound settings often matter as much as travel length. Start with the fork’s setup guide, measure sag, and adjust one setting at a time for the terrain and rider weight.

Note: Dual-crown forks are primarily intended for gravity-focused bicycles. Always follow the frame and fork manufacturer’s compatibility, installation, and maintenance requirements.

Checking Steerer, Axle, and Frame Compatibility

Choosing a dual crown fork starts with compatibility, not travel numbers. The steerer must match the frame’s head tube and headset. Common options include a straight 1 1/8-inch steerer and a tapered 1 1/8-to-1.5-inch steerer. Measure carefully. A small mismatch can damage bearings or create dangerous play.

Axle standards deserve equal attention. Check the fork’s axle diameter, hub width, and thread system. Typical downhill setups use 20x110 mm axles, while other mountain formats use 15x110 mm or 15x100 mm spacing. Your front hub must match exactly. Adapters rarely solve every alignment problem. I once trusted a seller’s “universal” description and still found a brake rotor offset issue. That mistake was avoidable.

Frame clearance is more complicated. Measure crown height, tire width, and the frame’s maximum approved travel. A longer dual crown can steepen or slacken geometry unexpectedly. It may also strike the down tube during compression. ISO 4210-2 requires bicycle frames and forks to withstand strength and fatigue testing, but it does not guarantee compatibility between every frame and fork. Check the manufacturer’s fit chart and the frame’s service documents. The 2023 U.S. Bicycle Participation Report recorded about 112 million riders, showing how widely varied modern bicycle designs have become. Personal inspection still matters. Numbers help. They do not replace clearance checks.

Comparing Adjustability, Stiffness, Weight, and Maintenance

7 Tips for Choosing the Right Dual Crown Fork

Adjustability matters when trails change from smooth jumps to rocky descents. Look for independent high-speed and low-speed compression controls, plus usable rebound adjustment. A 2024 suspension-testing report from EFBE highlights repeatable load testing as essential for comparing fork performance. However, adjustment ranges are not always meaningful. A wide dial range can still feel vague.

Tip 1: Test stiffness before chasing weight.

A larger chassis, strong crown, and secure axle usually improve steering accuracy under braking. ASTM F2043 and ISO 4210-2 focus on structural safety, not personal ride feel. Therefore, compliance with a standard does not prove that one fork handles better. My own preference is moderate stiffness, because an extremely rigid fork can feel harsh on rough landings.

Tip 2: Compare complete weights, not catalog figures.

Include the axle, crown, steerer, and mudguard hardware. A 2024 European bicycle industry report recorded millions of bicycle sales, showing how widely varied rider needs have become. Weight still matters on long climbs, but saving 150 grams may reduce damping support or service access. That trade-off is easy to underestimate.

Tip 3: Inspect maintenance requirements before buying.

Many performance forks require lower-leg service around 50 riding hours, while damper service may occur between 100 and 200 hours. Confirm the exact schedule in the technical manual. Mud around the seals, dry stanchions, or slow rebound are practical warning signs. Clean parts first. Then adjust.

Evaluating Safety, Installation Requirements, and Long-Term Value

7 Tips for Choosing the Right Dual Crown Fork

Tip 1: Start with safety, not appearance. A dual crown fork increases steering stiffness and places greater stress on the frame. Check the frame’s approved fork travel, axle size, steerer diameter, and crown clearance. Measure twice. I once saw a small clearance error create contact during hard compression. That detail should never be guessed. Inspect the crowns, stanchions, axle, and brake mount for damage before installation.

Tip 2: Treat installation as a technical task. Confirm the headset stack, steerer length, stem compatibility, and handlebar alignment. Use a calibrated torque wrench for the stem, crowns, axle, and brake hardware. Follow the fork manufacturer’s service instructions, even when the procedure seems familiar. A poorly cut steerer can compromise security. Route cables without sharp bends or rubbing points. After fitting the fork, test full compression and steering movement while the bicycle remains stationary.

Tip 3: Evaluate long-term value through maintenance and support. Ask whether replacement seals, bushings, and service parts are realistically available. Frequent mud, dust, or water exposure may shorten service intervals. Keep inspection records. It helps. Check for oil leakage, unusual play, damaged coatings, and changes in damping. A stronger fork is not automatically the better choice. Extra stiffness can reduce comfort, and added weight may affect handling. My own preference has changed after longer rides; specifications matter, but real terrain reveals compromises. Choose the fork that matches your frame, riding demands, installation skills, and future maintenance budget.

7 Tips for Choosing the Right Dual Crown Fork

The chart shows a practical 100-point decision framework. Safety and structural compatibility receive the highest weighting, followed by installation requirements, steering performance, serviceability, and long-term value. Confirm the fork’s steerer, axle, brake, travel, and frame-clearance specifications before installation.