Choosing the right Mtb Front Suspension can change how a bike feels on roots, rocks, and steep descents. A fork that tracks smoothly over a small bump may feel vague when braking hard. A firm setup can stay composed on fast trails but send sharp impacts through your hands. The best choice depends on your terrain, riding style, bike, and budget—not on travel numbers alone.
Start by checking compatibility. Wheel size, axle standard, steerer tube, brake mount, and frame clearance all need to match. Then consider travel and spring type. More travel can help on rough descents, but it may alter the bike’s handling and climbing position. Air forks are widely adjustable and relatively light; coil forks can feel consistent, though spring choice matters. Fit matters. Not just travel.
Damping and setup deserve equal attention. Rebound that is too fast can make the front wheel bounce; too slow can leave the fork packed down through repeated bumps. Set sag using the manufacturer’s guidance, then test the fork on a familiar trail. Change one setting at a time. There is no universal winner. It is easy to chase a premium model and overlook basic fit, maintenance, or setup. That trade-off matters. This guide explains the key choices, common compatibility checks, and practical setup points, so you can compare forks with a clearer idea of what your riding actually needs. A small compromise may remain, and that is worth noticing.
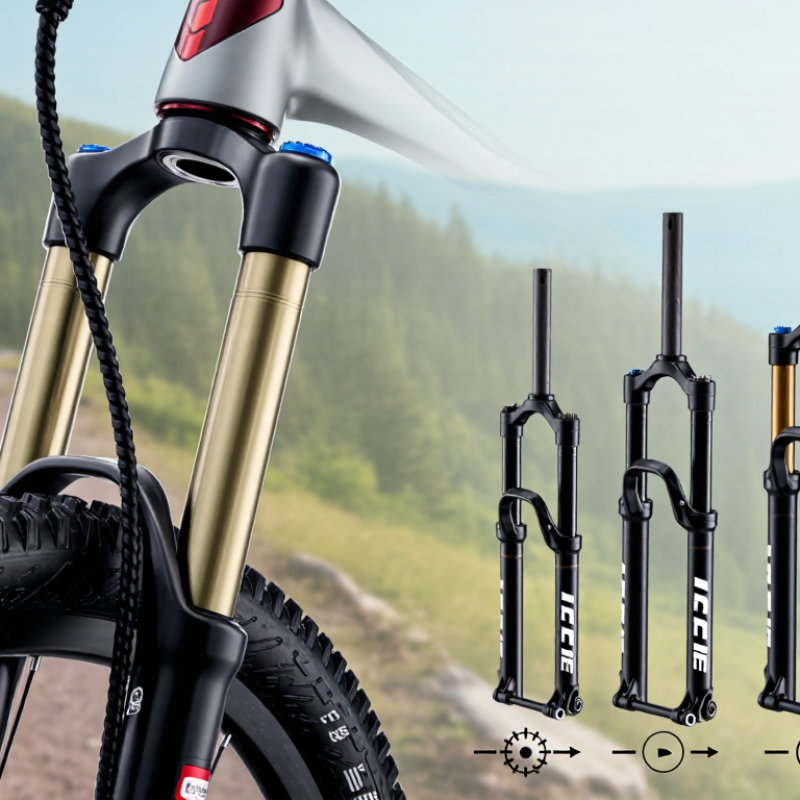
Mountain-bike front suspension is a spring and damper working together. The spring compresses when the front wheel hits a root; the damper controls how quickly it returns. Without damping, the fork can bounce and unsettle your hands. Too much damping can make sharp impacts feel harsh. That balance matters.
Travel describes how far the fork can move, not how plush it feels. Industry specifications commonly place cross-country forks near 100–120 mm and trail forks around 130–160 mm; these are typical ranges, not rules. Sag is the amount the fork compresses under the rider’s weight.
Set it too high, and the fork may sit deep in its travel before a descent begins. Set it too low, and small bumps can feel sharp. Change one setting at a time, then ride the same short section again.
PeopleForBikes’ 2024 U.S. Bicycling Participation Report recorded 112 million riders in 2023, a reminder that riding conditions and experience vary widely. A useful setup for smooth paths may not suit rocky, steep trails.
I still find rebound easy to misjudge: the front wheel should track the ground, not spring back like a pogo stick. Check settings against your fork’s service guidance, and reassess after changing tire pressure or riding gear.
Fork travel should fit the trails you actually ride, not just the biggest drop you might encounter. For smoother cross-country routes, a shorter-travel fork often keeps steering responsive and climbing efficient. Rough, steep trails can call for more travel to absorb repeated impacts and help the front wheel stay composed. More is not automatically better. Extra travel adds weight and can change how the bike handles.
Geometry matters just as much. A longer-travel fork can raise the front of the bike and slacken its head angle, which may feel steadier on descents but less nimble on tight climbs. Check the bike maker’s recommended travel range, then consider your usual terrain, pace, and comfort. Small details matter. Set sag with your riding gear on, and notice whether the fork uses too much travel on ordinary bumps or barely moves on rough sections. I used to focus on travel numbers alone; that missed how setup and riding position shape the feel. If possible, test a familiar trail with a suitable setup before changing parts. Test both. A few rides can reveal more than a specification sheet.
A front suspension fork should match your terrain, riding style, and maintenance habits. Air springs are light and easy to tune with a shock pump. Changing pressure can help support a heavier rider or reduce harshness on small bumps. Coil springs offer a consistent, supple feel, especially over repeated hits, but changing spring rate usually requires replacing the spring. Neither type is automatically better.
Damping controls how quickly the fork compresses and returns. Rebound that is too fast can make the front wheel bounce after a rock; rebound that is too slow may pack the fork down through a series of bumps. Compression adjustment can help balance support with comfort, though extra knobs are not always useful. Start with the fork maker’s setup guidance, then change one setting at a time on familiar trails. Small changes matter.
Adjustability only helps when settings are easy to understand and repeat. Set sag with your riding gear on, check that the fork uses its travel without harsh bottom-outs, and note each change. A simple setup log can prevent guesswork. It is tempting to chase perfect settings, but trail conditions vary, and a compromise is normal. Check for leaks, unusual noise, or reduced travel; those signs call for a qualified service check.
How to Choose the Best MTB Front Suspension?
Check Wheel, Axle, Brake, and Frame Compatibility
Before comparing suspension features, confirm that the fork matches your bike. Check the wheel size stamped on your tire, then compare it with the fork’s approved size. A mismatch can affect handling and tire clearance. Also check the axle type and width; the hub must fit securely without improvised spacers.
Brake compatibility matters just as much. Confirm the fork’s brake mount supports your caliper and rotor size. Then check the frame’s steerer tube dimensions and required steerer length. Measure carefully: a steerer cut too short cannot be made longer. Compare the fork’s travel and axle-to-crown length with your frame maker’s specifications, since a taller fork can alter steering and load the frame differently. Compatibility charts help, but details can be easy to overlook, so verify the exact model year and measurements.
Tips: Before buying, place your bike’s wheel beside the fork and check tire clearance. Read the frame and fork manuals. If a measurement is unclear, ask a qualified mechanic to inspect it. A few minutes of checking beats discovering a mismatch halfway through installation.
Compare the fork’s specifications with your frame and front wheel before buying. Compatibility depends on the exact frame, fork, wheel, and brake configuration.
| Compatibility check | Common specifications | What to verify | Potential mismatch |
|---|---|---|---|
| Wheel diameter | 26 in, 27.5 in (650B), or 29 in | Match the fork’s approved wheel size to the wheel and frame. Check tire width and actual tire clearance as well. | The tire may rub the fork crown or lowers; changing wheel size can also alter geometry and handling. |
| Front axle standard | 9 × 100 mm quick release; 15 × 100 mm through-axle; 15 × 110 mm Boost through-axle; 20 × 110 mm through-axle on some downhill setups | Match both axle type and hub spacing. Confirm the hub can accept the required end caps or axle standard. | A different axle diameter or hub spacing will not fit securely without a compatible hub or wheel. |
| Steerer tube | Straight 1⅛ in; tapered 1⅛-to-1½ in; less commonly, other standards | Check the frame’s head tube and headset. A tapered steerer generally needs a frame and headset designed to accept it; some configurations allow a straight steerer in a tapered head tube. | The steerer may not fit the headset, or the headset may not support the intended fork. |
| Brake mount and rotor | Post mount or IS mount; rotor sizes commonly include 160, 180, 203, and 220 mm | Identify the fork’s mount type, the brake caliper interface, and the permitted rotor-size range. Use an approved adapter when required. | The caliper may not attach correctly, or the rotor may be outside the fork’s approved size range. |
| Axle-to-crown length | Varies by wheel size, fork design, and travel; compare the exact measurement in the fork and frame specifications | Check the frame maker’s permitted axle-to-crown range, not just the wheel diameter or travel figure. | A longer or shorter fork can change head angle, bottom-bracket height, and handling; an unsuitable length may overstress the frame. |
| Fork travel | Common trail and cross-country options range roughly from 80 to 160 mm; longer travel is used on some gravity bikes | Stay within the frame’s approved travel range and consider the fork’s axle-to-crown length at that travel. | Excessive travel can change geometry and increase frame loads; too little may not suit the intended terrain. |
| Frame and tire clearance | Depends on fork arch, crown, wheel size, tire width, and frame design | Check clearance through the fork’s travel and account for mud, wheel flex, and the tire’s measured dimensions. | Insufficient clearance can cause rubbing or create a safety hazard. |
Before purchase: Confirm the exact specifications with the frame, fork, wheel, and brake documentation. Do not assume that matching wheel diameter alone guarantees compatibility.
Choosing an MTB fork starts with the rides you actually do, not the most impressive specification sheet. For repeated impacts, a dependable air or coil fork can reduce hand fatigue and help the front tire track steadily. On smoother trails, a simpler, lighter fork may be enough. Think about climbs, too.
Price is only the entry cost. Lower-cost forks may be heavier or offer fewer adjustments, while pricier models can provide lighter construction and more precise damping. Neither automatically suits every rider. Set aside money for setup and eventual service, including seals, lubrication, and replacement wear parts. A harsh feel may come from incorrect air pressure or sag, not a need to upgrade.
Weight matters most on long climbs or when lifting the bike over a gate. Maintenance matters every season. Air forks often need periodic pressure checks; coil systems are straightforward but still need inspection and service. Check the service interval and be honest about whether you will follow it. A common oversight: a neglected fork can lose smoothness gradually, making the change easy to miss. Choose a fork whose cost, weight, and upkeep fit your real routine, not an ideal one.
Balance budget, weight, and maintenance with the kind of riding you do. Start with the typical fork-travel ranges below.
Cross-country forks are typically lighter and use less travel; longer-travel forks suit rougher terrain but are generally heavier and may cost more. These are broad category ranges, not fixed specifications—actual weight, price, and service needs vary by fork. Check the manufacturer’s service schedule when comparing models.